
Affiliate Disclosure
Some links on this page are affiliate links. As an Amazon Associate, we earn from qualifying purchases — at no extra cost to you. We do not buy, install, or physically handle the lights and decorations we cover; our rankings come from aggregated owner feedback and expert consensus, not first-hand testing. Commissions never change our verdicts. How we research · full disclosure.
Top 3 Picks
If you are tired of climbing a ladder every December, learning how to install permanent Christmas lights is the mount-once fix. These permanent lights are weatherproof RGBIC LED points that fasten under your roofline and stay up year-round, controlled by an app for any color or holiday. This guide covers planning the run, mounting the track safely, wiring to the controller, and when to call a pro.
Tools and materials
- A permanent holiday light kit (LED track/points, channel, controller)
- A cordless drill and the fasteners specified by the kit
- A sturdy ladder, and a spotter
- A weatherproof GFCI outlet near the controller
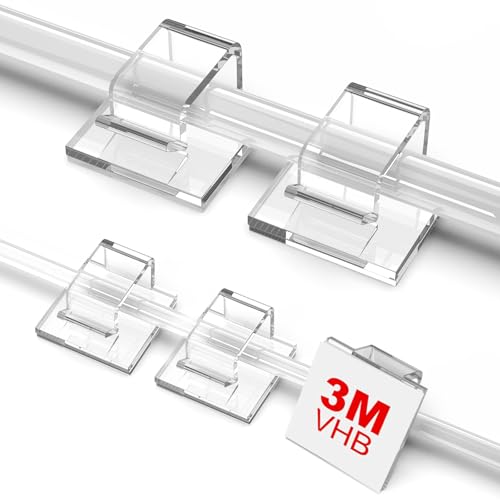
- A tape measure, chalk line or pencil, and cable clips
- Manufacturer's app on your phone
How to install permanent christmas lights, step by step
Measure the roofline, eaves, fascia and soffit
Start by measuring every roofline, eave and edge you want lit, and decide on a single consistent mounting line — usually just under the drip edge on the fascia, or tucked up into the soffit — so the channel disappears in daylight. Sketch where the controller and outlet will sit, then order track and points to match your total length plus a margin.
- Measure and plan the run. Measure every roofline, eave and edge you want lit, and sketch where the track will run and where the controller and outlet sit. Order track and points to match your total length plus a margin.
- Choose the mounting line. Decide on a consistent line — typically just under the drip edge or along the fascia — so the channel stays hidden in daylight. Mark it lightly so the run is straight.
- Mount the channel or clips. Working in sections from the ladder, fasten the aluminum channel or the individual clips along your marked line with the kit's screws, keeping it level and tucked under the roof edge.
- Seat the LED strip. Press the weatherproof LED strip or points into the channel, feeding it neatly around corners and leaving the service loops the instructions call for.
- Route the wiring to the controller. Run the low-voltage lead back to the controller location, securing the cable with clips so nothing dangles, and connect the controller to its power supply.
- Connect to power and Wi-Fi. Plug the controller's supply into a weatherproof GFCI outlet, then pair the controller with the app over Wi-Fi.
- Map, test and schedule. Use the app to map the light points to your house layout, test each zone, then set schedules or scenes — warm white for everyday, holiday colors on their dates.
Mounting the track, channel and clips
Working in sections from the ladder, fasten the aluminum channel or the individual mounting clips along your marked line, keeping it level and tucked under the roof edge. Then press the weatherproof LED strip or points into the channel, feeding it neatly around corners and leaving the service loops the instructions call for. Mounting clips suit a fascia with an awkward profile, while a continuous channel gives the cleanest hidden look.
Drill, screws and the mounting line
A cordless drill and the kit's own screws are all the mounting hardware most systems need. Snap or mark a straight line first and follow it religiously — a crooked channel is the one flaw that shows in daylight, long after the lights are off. Pre-drill hardwood fascia so screws seat flush without splitting the board.
RGB and RGBIC LED points, controller and power supply
The LED points come in two flavors. Plain RGB sets show one color across the whole run at a time; RGBIC points are individually addressable, so each dot can be a different color for chases, gradients and effects. Both wire back to a controller and a low-voltage power supply. Popular systems include Govee, Gemmy, Trimlight and Jellyfish, and they differ mostly in point spacing, brightness and app polish.
Wiring the transformer and controller to WiFi
Run the low-voltage lead back to the controller, securing the cable with clips so nothing dangles. The controller pairs with a transformer or plug-in power supply that steps mains voltage down to the safe low voltage the LEDs use — plug that into a weatherproof GFCI outlet. Then connect the controller to your home WiFi so the app can reach it. Most systems also link to Alexa for voice control.
App setup and permanent lights scheduling
Once the controller is on WiFi, use the app to map the light points to your house layout, test each zone, then build scenes and schedules — warm white for everyday, orange for Halloween, red and green on their dates. Good mapping is what separates a crisp, deliberate display from a random-looking one, so map before you schedule. Well-planned permanent lights then run themselves for years.
DIY versus professional install
The low-voltage LED side of these systems is genuinely beginner-friendly, and many homeowners install a single-story run themselves over a weekend. The parts that warrant caution are the ladder work at height and anything touching household power. If your home is two stories, the roof is steep, or the install needs a new outdoor circuit, bringing in a professional for those portions is the sensible call — you can still do the planning and app setup yourself. Weigh the upfront cost against never climbing a ladder for lights again.
Common mistakes to avoid
- Not planning the controller and outlet. Decide where power lives before you mount track, or you will be running cable the long way.
- A crooked mounting line. An uneven channel shows in daylight. Mark a straight line and follow it.
- Overreaching on the ladder. The single biggest injury cause. Move the ladder; use a spotter.
- DIY mains wiring. Leave new circuits and breaker work to a licensed electrician.
- Skipping the app mapping. Without mapping the points to your layout, patterns look random. Map before you schedule.
Choosing a system
Kits vary a lot in point spacing, brightness, app quality and controller features. The best permanent christmas lights roundup compares owner-rated systems, and the best christmas light controller guide covers the app-and-controller side if you want scenes, music sync and voice control. If a full permanent system is more than you need this year, the seasonal route in how to hang lights on a house and a simple light timer gets you most of the way for far less.
Our Picks

![All-Purpose Holiday Light Clips [Set of 200] Christmas Clips, Outdoor Light Clips - Mount](https://m.media-amazon.com/images/I/51RSgM9CF-L._SL500_.jpg)