
Affiliate Disclosure
Some links on this page are affiliate links. As an Amazon Associate, we earn from qualifying purchases — at no extra cost to you. We do not buy, install, or physically handle the lights and decorations we cover; our rankings come from aggregated owner feedback and expert consensus, not first-hand testing. Commissions never change our verdicts. How we research · full disclosure.
Top 3 Picks
Knowing how to connect Christmas lights together safely comes down to two things: matching the male and female ends, and respecting the connection limit printed on the tag. Chaining strands end to end is exactly what the connectors are for, but overloading a run is the most common way to blow a fuse or overheat the wire. This guide covers the connectors, the limit, the fuse, and how to build a long run without trouble.
Tools and materials
- Christmas light strands of the same type (all LED or all incandescent)
- Outdoor extension cords and a GFCI-protected outlet for outdoor runs
- Spare fuses matching the amperage on the strand tag
- A small screwdriver to open the fuse door
- An outdoor timer or smart plug
- The strand box or tag showing the connection limit
How to connect Christmas lights together, step by step
- Check the connection limit. Read the tag or box for the maximum number of sets you can connect end to end. This number is your hard ceiling for the whole run.
- Group the same type. Keep all-LED strands on one run and all-incandescent on another. Do not mix the two in a single chain.
- Test each strand first. Plug in every strand on its own and confirm it lights before you chain them, so a dead set does not hide in the middle.
- Identify male and female ends. The male end has the prongs; the female end has the socket holes. The first male plug goes to the power source.
- Plug male into female. Seat each strand's male plug firmly into the female end of the previous strand, working outward from the outlet.
- Count as you go. Keep a running tally of connected sets so you stop at the tag's limit rather than one strand past it.
- Start a new run if needed. When you reach the limit, run the next group of strands back to a separate outlet instead of chaining further.
- Power up and add a timer. Plug the first male end into a GFCI outlet or timer, confirm the whole run lights, and set the timer.
Male and female ends: how the chain works
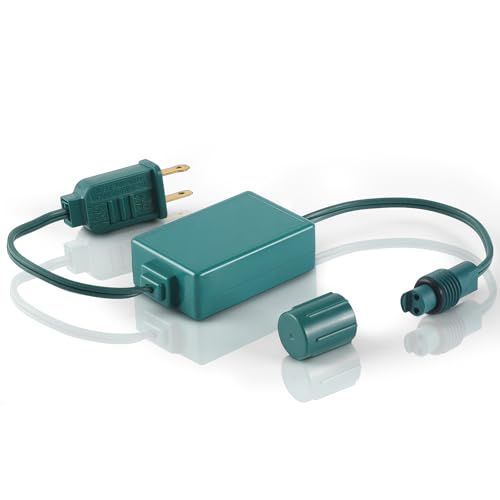
Every string light strand has two ends built for chaining. The male end carries the prongs and plugs into the wall or into the strand before it; the female end has the socket holes and receives the next strand's male plug. To build a run, you plug male into female, strand after strand, with the very first male plug going to the outlet, extension cord, or timer. Many strands also have a stacked plug that lets you branch, but the same rule applies — every connection counts toward the limit. Understanding this male-to-female flow is what lets you plan a run that reaches where you need it.
The connection limit and why it exists
The connection limit is the single most important number when you connect Christmas lights together. Each strand's wire is sized for a certain total current, and every set you add draws more through that first strand nearest the outlet. The tag states the maximum — commonly dozens of LED sets but only a handful of incandescent, because incandescent bulbs draw far more power per bulb. Exceed it and the wire overheats and the plug fuse blows. LED strands are the reason modern displays can chain so far: their tiny draw lets you connect long runs safely. The best christmas string lights roundup lists the connection limits owners report.
The fuse in the plug
That connection limit is enforced by a fuse hidden in the male plug. Slide open the small door on the plug and you will find one or two tiny glass fuses. If a connected run suddenly goes dark, a blown fuse from an overloaded chain is a leading suspect. Replace it only with a fuse of the same amperage rating — fitting a higher-rated fuse defeats the protection and turns an overload into a fire risk. Keeping a few spare fuses on hand saves a display when one lets go mid-season.
Building a long run across a display
For a big display, the trick is not to chain everything into one line but to split it. Divide the display into zones, keep each zone within the connection limit, and run each back to its own GFCI outlet. This keeps every strand within its rating and means one blown fuse only darkens one zone, not the whole yard. A timer or smart plug on each zone lets the display run on schedule. When you connect the outdoor portions, keep every joint off the wet ground — see how to hang christmas lights outside for the full outdoor power plan.
Common mistakes to avoid
- Exceeding the connection limit. It overheats the wire and blows the fuse. Count sets and stop at the tag's maximum.
- Mixing LED and incandescent. Different draws overload the run. Keep each type on its own chain.
- Fitting a higher-rated fuse. It removes the protection. Replace with the same amperage only.
- Loose connections. A half-seated plug flickers or fails. Push each joint together firmly.
- Connectors on wet ground. That is a shock risk outdoors. Keep every joint up and dry on a GFCI circuit.
Related lighting guides
Connecting is one part of a bigger display. See best christmas light timer to automate each zone, how to hang lights on a tree outside, and how to store christmas lights so the strands come out ready to chain next year.
Our Picks