
Affiliate Disclosure
Some links on this page are affiliate links. As an Amazon Associate, we earn from qualifying purchases — at no extra cost to you. We do not buy, install, or physically handle the lights and decorations we cover; our rankings come from aggregated owner feedback and expert consensus, not first-hand testing. Commissions never change our verdicts. How we research · full disclosure.
Top 3 Picks
To test Christmas lights, work from the plug outward: confirm the outlet has power, check the two inline fuses in the plug, then use a multimeter or a non-contact voltage tester to trace where power stops along the string. On most dead incandescent strands the culprit is a single burned-out bulb or a blown fuse — both are cheap, fast fixes once you know how to test each one.
Tools to test a Christmas light strand: multimeter, continuity and a voltage tester
You can diagnose almost any strand with one or two inexpensive tools. Pick whichever you already own — the method is the same.
- Multimeter — set to continuity (the beep symbol) or AC voltage; the most versatile option for bulbs, fuses and wiring.
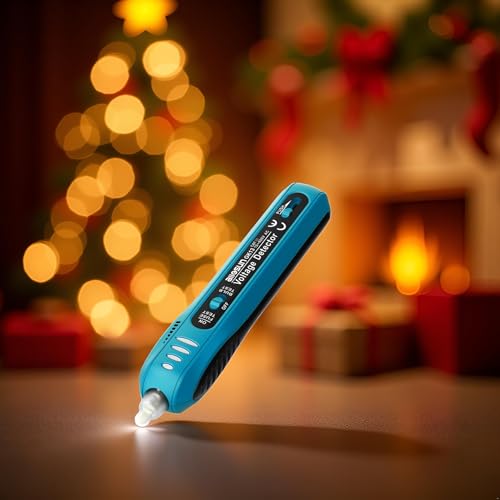
- Non-contact voltage tester — a pen-style detector that glows when it senses live wire, ideal for finding where voltage stops along the string.
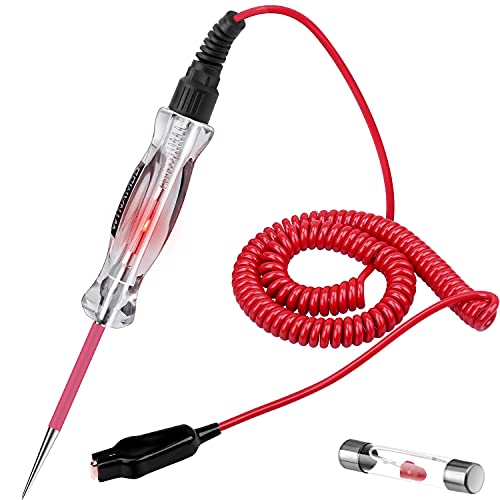
- Christmas-light tester — a combined bulb tester, fuse tester and voltage detector sold for exactly this job.
- A known-good spare bulb — the no-tool method; swap it into a suspect socket to confirm a dead bulb versus a dead socket.
How to test Christmas lights step by step
- Confirm the outlet works. Plug a lamp or phone charger into the same outlet. If nothing runs, the problem is the outlet or a tripped GFCI, not the lights.
- Check the inline fuses. Slide open the small door on the plug, remove the two glass fuses, and test each for continuity with a multimeter. A blown fuse reads open; replace it with the same amp rating printed on the plug.
- Test for voltage along the string. Plug the lights back in and run a non-contact voltage tester bulb-to-bulb. Where the glow stops is where the circuit is broken.
- Test the suspect bulb. Unplug, pull the bulb nearest the break, and check it for continuity — or drop it into a known-good socket and see if it lights.
- Reseat and retest. Push every bulb firmly into its socket, since a loose bulb reads as an open circuit, then plug in and confirm the whole strand lights.
How to test the inline fuse
The two small fuses hidden in the plug are the number-one reason a whole strand goes dark. Unplug the lights, slide the little cover open with a fingernail or flat screwdriver, and tip out the two glass cartridge fuses. Set a multimeter to continuity and touch a probe to each end of a fuse: a beep means it is good, silence means it is blown. Replace a blown fuse only with the identical amp rating stamped on the plug — usually 3A or 5A — because a higher-rated fuse defeats the strand's overload protection. Our page on how to replace a Christmas light fuse walks through it in detail.
How to test an individual bulb: LED vs incandescent
If the fuses are fine but a section stays dark, the break is a bulb. Set your multimeter to continuity and press one probe to each of the bulb's two thin leads. A working incandescent bulb beeps; a burned-out one is silent. LED bulbs are polarity-sensitive, so a good LED only reads continuity with the probes one way round — reverse them if the first test is silent. No multimeter? Pull the suspect bulb, drop it into a socket you know works on another strand, and watch whether it lights. Replacing it is covered in how to replace a Christmas light bulb.
Using a voltage tester to find the break in the series
A non-contact voltage tester is the quickest way to narrow a break on a long string. Plug the lights in, switch the tester on, and slide its tip along the wire from the plug toward the far end. The tester glows while it senses live voltage and goes dark once it passes the fault. The first bulb where the glow disappears sits right at the break — start your bulb testing there. This turns a hundred-bulb strand from a guessing game into a ten-second scan.
Common mistakes when you test a strand
- Skipping the outlet check. A tripped GFCI or dead outlet mimics a dead strand — always rule the outlet out first.
- Ignoring the second fuse. Plugs hold two fuses; testing only one leaves a blown fuse in place.
- Testing an LED bulb one way. LEDs conduct in a single direction, so reverse the probes before declaring one dead.
- Repairing a damaged strand. A cracked cord or melted plug is a fire risk — retire it rather than testing around the damage.
When to replace the strand instead of testing
Testing pays off when a strand is otherwise healthy — a good cord, an intact plug, and only a bulb or fuse at fault. Once you find frayed insulation, a warm or discolored plug, or multiple broken sections, the honest move is to recycle the set and buy a new one. Owners consistently rate modern LED strings for lasting far longer and running cooler, so a fault-prone incandescent strand is rarely worth chasing. For replacements, see our picks for the best LED Christmas lights.
Related reading: why are my Christmas lights flickering, one bulb out and the whole string is dead, and the Troubleshooting & Repair hub.
Our Picks